Google Photos has become an integral part of our digital lives, seamlessly storing and organizing our precious memories. However, managing your backup settings can sometimes be confusing. Whether you’re looking to take a backup of your photos or disable it altogether, this guide will walk you through the process, ensuring you have complete control over your Google Photos experience.Google Photos offers flexibility in managing your photo backups, allowing you to either back up your photos for safekeeping or disable this feature to save cloud storage space. Here’s how to manage these settings across different devices.
Navigating the world of digital storage can be daunting, especially when it comes to preserving your cherished memories in photos and videos. Google Photos offers a robust platform for not only storing your digital memories but also managing how they are backed up. Whether you’re looking to safeguard your precious moments against accidental loss or optimize your device’s storage, understanding the intricacies of managing backups in Google Photos is essential. In this step-by-step guide, we’ll explore how to effectively manage your backups, ensuring that your photos are secure and accessible across all your devices.
Understanding Google Photos Backup
Before we dive into the how-to, it’s important to understand how Google Photos backup works. Essentially, it automatically uploads photos and videos from your device to the cloud, making them accessible from any device with an internet connection. This is fantastic for safeguarding your memories and freeing up storage space on your phone.
Taking a Backup in Google Photos
If you’re new to Google Photos or want to ensure your latest photos are backed up, follow these steps:
- Open Google Photos: Launch the Google Photos app on your device.
- Sign in: Make sure you’re signed in to your Google account.
- Check Backup Settings: Tap on your profile picture in the top right corner. Then, go to ‘Photos settings’ > ‘Back up & sync’.
- Enable Backup: Toggle the ‘Back up & sync’ option to the ‘On’ position.
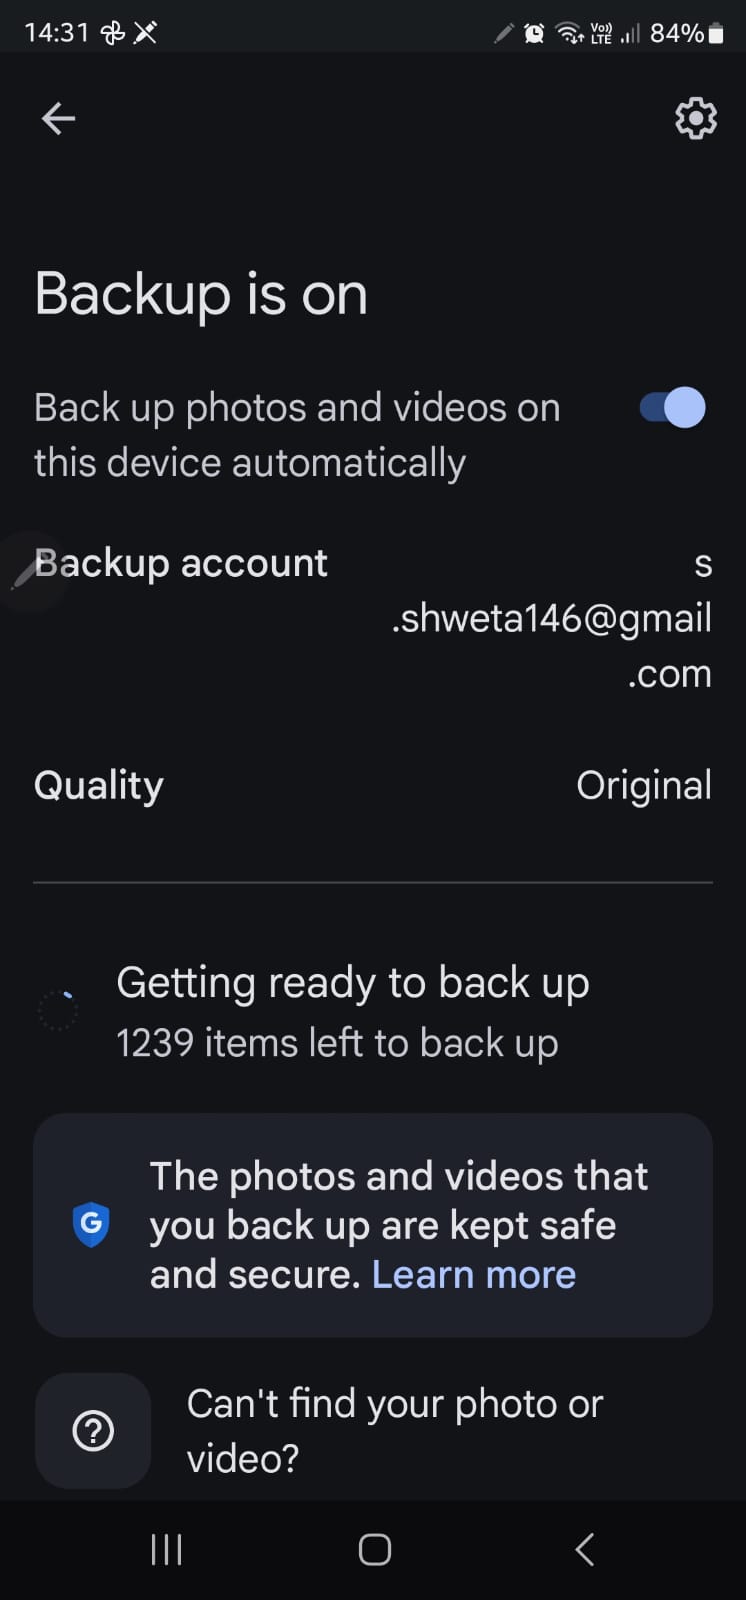
- Choose Upload Size: Select your preferred upload size – ‘Original quality’ (unlimited storage until June 1, 2021, then counts towards your Google account storage) or ‘Storage saver’ (compressed quality, unlimited free storage).
- Wait for Upload: Google Photos will now start backing up your photos and videos. The time it takes will depend on the number of files and your internet speed.
Pro Tip: I personally prefer the ‘Storage saver’ option as it offers unlimited free storage, and the quality difference is barely noticeable for most photos.
Disabling Backup in Google Photos
If you’re running low on Google storage or simply don’t want to back up your photos anymore, you can disable the backup feature:
- Open Google Photos and Sign in: Follow the same initial steps as mentioned above.
- Navigate to Backup Settings: Go to your profile picture > ‘Photos settings’ > ‘Back up & sync’.
- Disable Backup: Toggle the ‘Back up & sync’ option to the ‘Off’ position.
Important: Disabling backup will prevent new photos and videos from being uploaded to Google Photos. However, it won’t delete any photos or videos that have already been backed up.
Additional Tips for Managing Backups in Google Photos
- Cellular Data Backup: If you have a limited data plan, consider enabling ‘Backup on Wi-Fi only’ in the backup settings to avoid excessive data usage.
- Device Folders Backup: You can choose which device folders to back up by going to ‘Photos settings’ > ‘Back up & sync’ > ‘Back up device folders’.
- Delete Photos from Device: Once your photos are safely backed up to Google Photos, you can delete them from your device to free up storage space. Remember to check the ‘Free up space’ option in the app settings.
- Manual Backup: If automatic backup is disabled, you can still manually back up individual photos by selecting them and choosing the “Back up now” option.
- Using Google Photos Without an Account: If you prefer not to sync your photos, you can use Google Photos without logging in by selecting “Use without an account” from the profile menu.
For Android and iOS Devices:
- Open the Google Photos App: Start by launching Google Photos on your device.
- Access Settings: Tap on your profile picture in the top-right corner to open the menu, then select “Google Photos Settings.”
- Manage Backup Settings: Here, you’ll find the option “Backup and Sync.” Tap on it.
- Toggle Backup and Sync: You can disable the feature by toggling off the “Backup and Sync” option. This will stop automatic uploads to Google Photos, but your existing cloud-stored photos will remain intact.
For Desktop (Mac and Windows):
- Google Drive App Requirement: On desktops, Google Photos operates through the Google Drive app.
- Open Google Drive: Click on the Google Drive icon in your system tray or menu bar.
- Access Settings: Click the gear icon to open settings.
- Pause Syncing: Find and select the “Pause syncing” option to stop automatic backup to Google Drive.
These steps provide a comprehensive approach to managing your photo backups in Google Photos, ensuring you have control over your data and storage preferences. Managing your Google Photos backup is crucial for preserving your memories and optimizing your storage. Whether you’re taking a backup or disabling it, the steps outlined in this guide will empower you to make informed decisions about your photo storage. Remember, Google Photos is a powerful tool, and understanding its backup functionality will enhance your overall experience.
Mastering the management of your backups in Google Photos not only safeguards your memories but also enhances your experience using digital storage solutions. This guide has equipped you with the necessary steps to ensure your photos and videos are securely backed up, giving you peace of mind and freeing up space on your devices. By following the outlined steps, you can tailor Google Photos to suit your storage needs and preferences, making it a powerful tool in your digital arsenal. Remember, regular maintenance of your backup settings is key to keeping your digital life organized and protected.For more information, click here.

